Use the mapping tool to draw amendment areas on the map.
Step 1
Go to the map request form and select 'Next' to continue.
Step 2
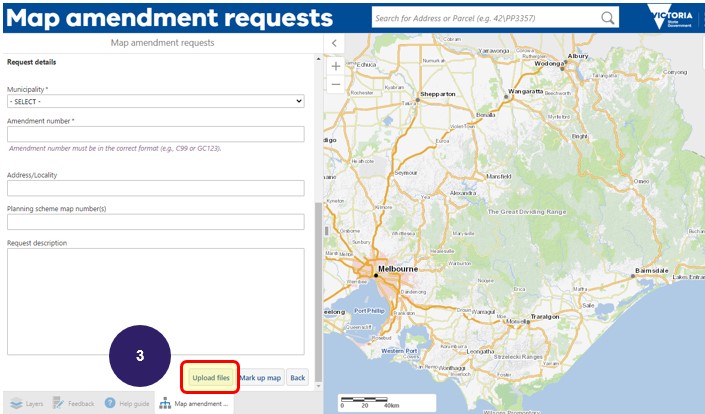
Fill out details about the amendment in the form. When complete select 'Mark up map' at the bottom of the form.
The ‘Mark up map’ option should be used when the proposed zone or overlay is a simple feature, and areas cover a single or small number of properties.
Step 3
The map will zoom to the extent of the LGA selected.
Find the amendment area by either using the zoom functions or the address search toolbar.
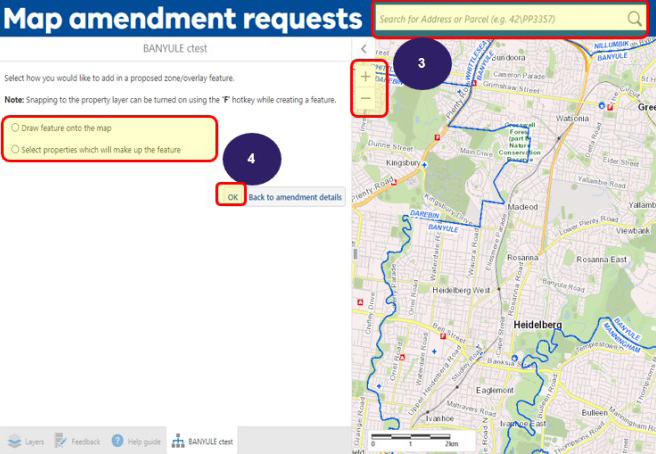
Step 4
Select an option to digitise an area of proposed zone or overlay and select 'OK'.
Draw feature onto the map
Selecting the map will start the draw function. The feature can then be built-up by clicking at various points on the map.
Double-clicking the map will finish the drawing. The feature will appear on the map with a notification that it has been created.
Automatic snapping to the property layer for the drawing can be turned on using the hotkey 'F'.
Select properties to make up a feature
You can choose to select properties on the map using either freehand (draw a freehand line on the map) or multiple points (select several points on the map).
Freehand: Select the map to start the draw function for the feature which will select the underlying property boundaries. The selection can then be built by moving the cursor while holding down the left mouse button over the properties on the map.
Releasing the left mouse button will finish the selection of the property boundaries which will make up the feature. The feature will appear on the map with a notification that it has been created.
Multiple Points: Select the map to create a circle which indicates that the underlying property at that point has been selected as a part of the feature.
After all points have been added, double-clicking on the map will finish the capture of the feature. The feature will appear on the map with a notification that it has been created.
Selecting the 'Select by multiple points' button after the drawing is complete will reset the drawing.
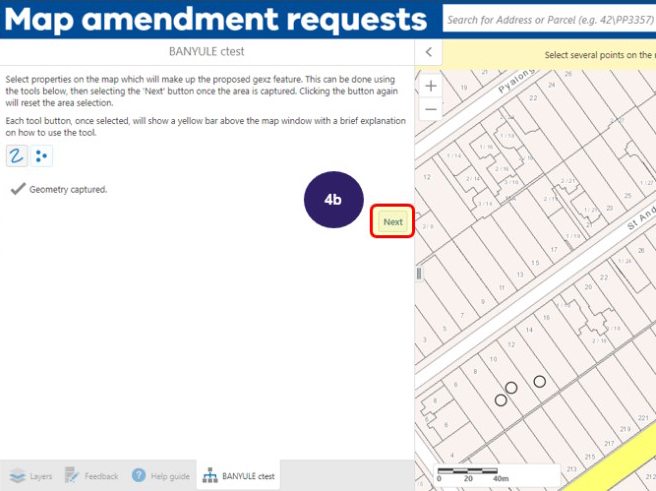
Select 'Next' when ready to proceed with the selected area.
Step 5
When the feature is added or geometry captured a 'Success' mesage will appear. Select OK.
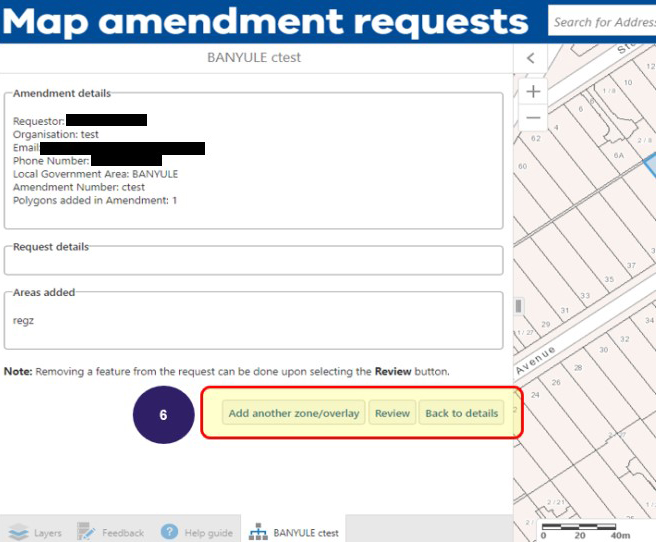
Step 6
The amendment summary screen dispays all request details for review.
Another zone or overlay feature can be added to the amendment request.
Details can be updated by selecting ‘Back to details’
If all the details are correct, select the ‘Review’ button to check the amendment features before submitting.
Step 7
On the review screen, hovering over any item on the list of zone/overlay features will highlight the feature (7).
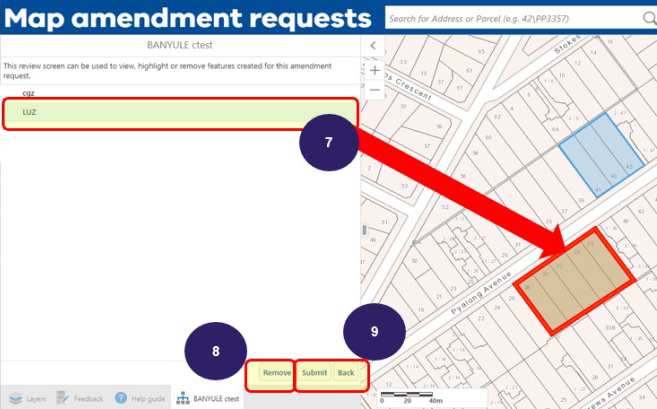
If a proposed feature is incorrect, select it from the listing and press ‘Remove’ (8). This removes the selected feature.
Navigate back to the map amendment summary screen and add a new zone or overlay if required.
Select 'Back' (9) to return to the map amendment summary screen and add new zone or overlay features if required.
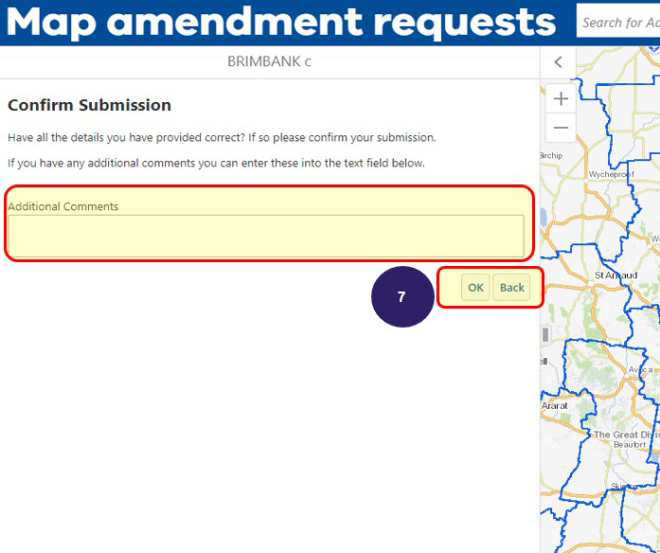
If all proposed features are correct, selecting the ‘Submit’ (9) button will submit the map amendment request. Enter additional comments if required and select 'OK'
Step 8
Confirmation will display when submitted.
An email confirmation will be sent to the email address entered in request details and will include an image file showing the selected map area.